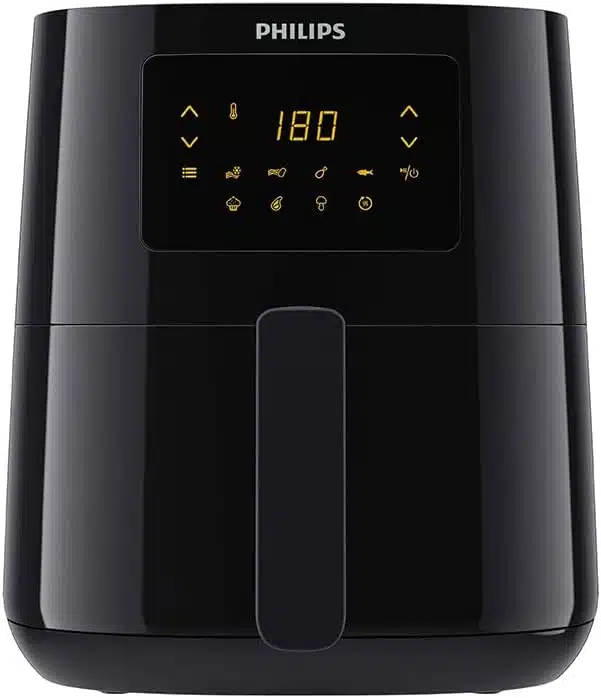
Air fryers are at their best when they behave like a small, fast oven that happens to crisp. The Philips HD9252/90 leans into that idea with a comfort-food-lean personality: it’s designed to get dinner from ‘plan’ to ‘plate’ with fewer steps and a shorter warm-up. Where traditional ovens ask you to commit, this model lets you iterate—cook, check, shake, finish—so you can tune crunch and tenderness to the food in front of you.
Before you click “buy”, scan the listing for a few decision-checks:
- Confirm the exact variant you need
- Check recent reviews for your use case
- Look at returns/warranty to reduce risk
In this review, I’ll stay disciplined about the numbers: any product specs you see are pulled from the official documentation and reputable listings in the Sources section. Everything else is practical cooking guidance—how to load the basket, how to avoid steam, and how to build flavor so your fries taste like fries and your vegetables taste like themselves, only better. If your goal is repeatable results in the HD9252/90, you’re in the right place.
Capacity matters here: 4.1 L gives you room to cook real portions. The trick is to treat the basket like a convection rack: let hot air reach the surface, and you’ll get the browning you want without drying the interior.
Want the fastest next step? Open one solid option and verify the key details in seconds.
Quick Verdict
The Philips HD9252/90 is a practical air fryer built for everyday crisping, quick roasting, and weeknight momentum. With a 4.1 L bowl, you can think in full meals rather than small sides. The best results come from airflow discipline—single layers when possible, and a quick shake when you’re stacking or crowding.
It’s for you if…
- You want crisp, oven-like results with less mess on busy weeknights. (That’s where the HD9252/90 feels most effortless.)
- You prefer repeatable routines: shake once, check once, serve confidently. (That’s where the HD9252/90 feels most effortless.)
- You like cooking proteins and vegetables back-to-back without heating a full oven. (That’s where the HD9252/90 feels most effortless.)
It’s not for you if…
- You expect deep-fryer texture for every batter without adjusting technique. (The HD9252/90 still benefits from mindful batch sizing.)
- You hate running two rounds when cooking for a crowd. (The HD9252/90 still benefits from mindful batch sizing.)
- You want a countertop appliance that disappears into a drawer after every use. (The HD9252/90 still benefits from mindful batch sizing.)
Verified Specs Table
| Model | HD9252/90 |
|---|---|
| Capacity | 4.1 L |
| Basket Capacity | 0.8 kg |
| Portions | 4 |
| Power | 1400 W |
| Cord Length | 0.8 m |
| Dimensions (L×W×H) | 360 × 264 × 295 mm |
| Weight | 4.55 kg |
What Makes This Model Different
The Philips HD9252/90 isn’t trying to be every appliance at once. Its advantage comes from a few concrete, spec-backed choices—capacity, power, and (for some variants) connected control—that change how you cook day to day.
If this sounds like you, start here and compare the details that matter to you.
Check on Amazon- A compact 4.1 L size that fits smaller counters and smaller households (This is where the HD9252/90 feels distinct in a real kitchen routine.)
- 1400W output that’s well-suited to quick snacks and weeknight sides (This is where the HD9252/90 feels distinct in a real kitchen routine.)
- A 0.8 kg basket that rewards ‘cook in layers’ thinking: do two rounds for big crowds (This is where the HD9252/90 feels distinct in a real kitchen routine.)
To get the best from the HD9252/90, lean into airflow logic: smaller batches cook faster, and single-layer cooking crisps more evenly. When you do cook bigger loads, treat it like two quick rounds rather than one long, steamy round.
Cooking Performance Deep Dive
Performance in an air fryer comes down to three things: airflow, surface dryness, and heat recovery. The Philips HD9252/90 is built to move hot air aggressively enough to brown food, while keeping the workflow simple—load, set, shake, finish. When you open the basket, heat escapes; units with higher wattage often recover faster, which helps your second half of cooking stay punchy. For this model, the published power is 1400 W.
Open 2–3 listings and compare the same criteria (variants, returns, reviews).
- Best overall: Klarstein VitAir 2.0 Air Fryer
- Best value: Xiaomi Mi Smart Air Fryer 3.5L
- Upgrade pick: Ninja AF100EU Air Fryer
Airflow and basket loading
The fastest way to improve results in the HD9252/90 is to stop thinking ‘more food at once’ and start thinking ‘more air around the food.’ If you can see gaps between pieces, you’re on the right track. If pieces overlap, plan for at least one shake or turn so the blocked surfaces get a chance to brown.
Moisture management
Moisture is the stealth villain of crispness. For fries and vegetables, dry thoroughly after washing. For proteins, blot marinades and glazes so they don’t drip and steam. The HD9252/90 will brown better when the surface is dry and lightly oiled rather than wet and sauce-heavy.
Open the listing, check warranty + compatibility/size, and you’ll know quickly if it fits your needs.
Check on AmazonBatch strategy
With a 4.1 L basket class, you can cook meaningful portions—just remember that crispness is still a single-layer sport. If you’re feeding more people than one layer can handle, do two fast batches. The second batch usually cooks faster because the chamber is already hot.
Texture targets that work well
Think of the HD9252/90 as a crisping tool. It shines at: roasted vegetables with browned edges, reheated leftovers that regain bite, breaded snacks that get their crunch back, and proteins that benefit from dry heat (like wings and thighs). For wet batters and delicate sauces, cook first and sauce after—your texture will stay sharp.
Before you click “buy”, scan the listing for a few decision-checks:
- Confirm the exact variant you need
- Check recent reviews for your use case
- Look at returns/warranty to reduce risk
Cooking Time & Temperature Guide
Instead of chasing a single ‘perfect’ number, use a repeatable method with the Philips HD9252/90: pick a starting temperature, cook in short blocks, and adjust based on browning and texture. Air fryers vary, food moisture varies, and basket loading changes airflow—so the best guide is a set of rules you can apply every time.
Practical adjustment rules
- If food browns fast but stays pale inside, lower the heat slightly and extend the time. (This keeps your results consistent with HD9252/90 without guessing your unit’s exact heat curve.)
- If food looks dry before it’s done, reduce heat a touch and finish with a sauce or glaze. (This keeps your results consistent with HD9252/90 without guessing your unit’s exact heat curve.)
- If you doubled the amount, don’t double the time—cook in two thinner rounds instead. (This keeps your results consistent with HD9252/90 without guessing your unit’s exact heat curve.)
- If breading won’t color, add a light oil mist and flip once. (This keeps your results consistent with HD9252/90 without guessing your unit’s exact heat curve.)
- If vegetables steam, spread them out and preheat briefly so the basket is hot from the start. (This keeps your results consistent with HD9252/90 without guessing your unit’s exact heat curve.)
- If frozen items clump, separate early and shake once more than you think you need. (This keeps your results consistent with HD9252/90 without guessing your unit’s exact heat curve.)
Quick guide (use as a starting point)
| Roasted vegetables | High-ish heat works; cut evenly for uniform caramelization. |
|---|---|
| Reheating pizza | Short bursts; finish quickly to re-crisp without drying. |
| Frozen fries | Start hot; shake early to stop clumping, then finish to crisp. |
| Chicken thighs | Aim for browned edges; rest briefly before slicing. |
| Baked goods | Lower heat than you’d use for fries; check early and often. |
| Salmon fillet | Moderate heat; stop while still slightly translucent at the center, then rest. |
| Chicken wings | Cook until skin tightens, then finish hotter for crackle. |
| Steak strips | High heat and short time; do not overcrowd. |
| Breaded snacks | Use an oil mist; flip once for even color. |
One last chef-y trick: write down the exact basket load you used (half-full vs nearly full) next to the food. That single note helps you recreate results in the HD9252/90 more reliably than any generic chart.
Want the fastest next step? Open one solid option and verify the key details in seconds.
30+ Recipes to Match This Model
1. Peppers with parmesan and black pepper
Start with a simple seasoning base (salt + one aromatic), then push flavor with a finishing element like lemon zest, a sticky glaze, or a fresh herb shower. In a 4.1 L basket, this works best as a single layer for even color. Pat ingredients dry before seasoning; moisture is the enemy of crunch.
2. Cinnamon Apples with vanilla and warm spice
Start with a simple seasoning base (salt + one aromatic), then push flavor with a finishing element like lemon zest, a sticky glaze, or a fresh herb shower. In a 4.1 L basket, this works best as a single layer for even color. A light mist of oil helps browning without turning things greasy.
If this sounds like you, start here and compare the details that matter to you.
Check on Amazon3. Croutons with rosemary salt
Start with a simple seasoning base (salt + one aromatic), then push flavor with a finishing element like lemon zest, a sticky glaze, or a fresh herb shower. In a 4.1 L basket, this works best as a single layer for even color. If you’re cooking for a crowd, run two thinner batches instead of one packed one.
4. Stuffed Jalapeños with a crunchy breadcrumb coat
Start with a simple seasoning base (salt + one aromatic), then push flavor with a finishing element like lemon zest, a sticky glaze, or a fresh herb shower. In a 4.1 L basket, this works best as a single layer for even color. Use a rack or parchment only when it doesn’t block airflow.
Open 2–3 listings and compare the same criteria (variants, returns, reviews).
- Best overall: Aigostar 30L Air Fryer Oven
- Best value: Instant Pot Duo Crisp + Air Fryer
- Upgrade pick: Meyer 3.5L Air Fryer
5. Mozzarella Sticks with a crunchy breadcrumb coat
Start with a simple seasoning base (salt + one aromatic), then push flavor with a finishing element like lemon zest, a sticky glaze, or a fresh herb shower. In a 4.1 L basket, this works best as a single layer for even color. Season right after cooking so salt and spices cling while the surface is hot.
6. White Fish glazed with citrus and soy
Start with a simple seasoning base (salt + one aromatic), then push flavor with a finishing element like lemon zest, a sticky glaze, or a fresh herb shower. In a 4.1 L basket, this works best as a single layer for even color. Give the basket a quick shake halfway so the hot air can reach every surface.
Open the listing, check compatibility/size + compatibility/size, and you’ll know quickly if it fits your needs.
Check on Amazon7. Sausages with a punchy spice rub
Start with a simple seasoning base (salt + one aromatic), then push flavor with a finishing element like lemon zest, a sticky glaze, or a fresh herb shower. In a 4.1 L basket, this works best as a single layer for even color. Pat ingredients dry before seasoning; moisture is the enemy of crunch.
8. Shrimp glazed with citrus and soy
Start with a simple seasoning base (salt + one aromatic), then push flavor with a finishing element like lemon zest, a sticky glaze, or a fresh herb shower. In a 4.1 L basket, this works best as a single layer for even color. A light mist of oil helps browning without turning things greasy.
Before you click “buy”, scan the listing for a few decision-checks:
- Confirm the exact variant you need
- Check recent reviews for your use case
- Look at returns/warranty to reduce risk
9. Broccoli with parmesan and black pepper
Start with a simple seasoning base (salt + one aromatic), then push flavor with a finishing element like lemon zest, a sticky glaze, or a fresh herb shower. In a 4.1 L basket, this works best as a single layer for even color. If you’re cooking for a crowd, run two thinner batches instead of one packed one.
10. Tempura-Style Mushrooms with a crunchy breadcrumb coat
Start with a simple seasoning base (salt + one aromatic), then push flavor with a finishing element like lemon zest, a sticky glaze, or a fresh herb shower. In a 4.1 L basket, this works best as a single layer for even color. Use a rack or parchment only when it doesn’t block airflow.
Want the fastest next step? Open one solid option and verify the key details in seconds.
11. Eggplant with parmesan and black pepper
Start with a simple seasoning base (salt + one aromatic), then push flavor with a finishing element like lemon zest, a sticky glaze, or a fresh herb shower. In a 4.1 L basket, this works best as a single layer for even color. Season right after cooking so salt and spices cling while the surface is hot.
12. Crispy Chickpeas with a crunchy breadcrumb coat
Start with a simple seasoning base (salt + one aromatic), then push flavor with a finishing element like lemon zest, a sticky glaze, or a fresh herb shower. In a 4.1 L basket, this works best as a single layer for even color. Give the basket a quick shake halfway so the hot air can reach every surface.
13. Turkey Burgers with a punchy spice rub
Start with a simple seasoning base (salt + one aromatic), then push flavor with a finishing element like lemon zest, a sticky glaze, or a fresh herb shower. In a 4.1 L basket, this works best as a single layer for even color. Pat ingredients dry before seasoning; moisture is the enemy of crunch.
14. Eggplant tossed in harissa butter
Start with a simple seasoning base (salt + one aromatic), then push flavor with a finishing element like lemon zest, a sticky glaze, or a fresh herb shower. In a 4.1 L basket, this works best as a single layer for even color. A light mist of oil helps browning without turning things greasy.
15. Lamb Kofta with a punchy spice rub
Start with a simple seasoning base (salt + one aromatic), then push flavor with a finishing element like lemon zest, a sticky glaze, or a fresh herb shower. In a 4.1 L basket, this works best as a single layer for even color. If you’re cooking for a crowd, run two thinner batches instead of one packed one.
16. Shrimp with a punchy spice rub
Start with a simple seasoning base (salt + one aromatic), then push flavor with a finishing element like lemon zest, a sticky glaze, or a fresh herb shower. In a 4.1 L basket, this works best as a single layer for even color. Use a rack or parchment only when it doesn’t block airflow.
17. Brussels Sprouts with parmesan and black pepper
Start with a simple seasoning base (salt + one aromatic), then push flavor with a finishing element like lemon zest, a sticky glaze, or a fresh herb shower. In a 4.1 L basket, this works best as a single layer for even color. Season right after cooking so salt and spices cling while the surface is hot.
18. Carrots with parmesan and black pepper
Start with a simple seasoning base (salt + one aromatic), then push flavor with a finishing element like lemon zest, a sticky glaze, or a fresh herb shower. In a 4.1 L basket, this works best as a single layer for even color. Give the basket a quick shake halfway so the hot air can reach every surface.
19. Cookie Skillet with vanilla and warm spice
Start with a simple seasoning base (salt + one aromatic), then push flavor with a finishing element like lemon zest, a sticky glaze, or a fresh herb shower. In a 4.1 L basket, this works best as a single layer for even color. Pat ingredients dry before seasoning; moisture is the enemy of crunch.
20. Pita Crisps with a crunchy breadcrumb coat
Start with a simple seasoning base (salt + one aromatic), then push flavor with a finishing element like lemon zest, a sticky glaze, or a fresh herb shower. In a 4.1 L basket, this works best as a single layer for even color. A light mist of oil helps browning without turning things greasy.
21. Sweet Potato Wedges with rosemary salt
Start with a simple seasoning base (salt + one aromatic), then push flavor with a finishing element like lemon zest, a sticky glaze, or a fresh herb shower. In a 4.1 L basket, this works best as a single layer for even color. If you’re cooking for a crowd, run two thinner batches instead of one packed one.
22. Tofu with a punchy spice rub
Start with a simple seasoning base (salt + one aromatic), then push flavor with a finishing element like lemon zest, a sticky glaze, or a fresh herb shower. In a 4.1 L basket, this works best as a single layer for even color. Use a rack or parchment only when it doesn’t block airflow.
23. Fries with rosemary salt
Start with a simple seasoning base (salt + one aromatic), then push flavor with a finishing element like lemon zest, a sticky glaze, or a fresh herb shower. In a 4.1 L basket, this works best as a single layer for even color. Season right after cooking so salt and spices cling while the surface is hot.
24. Pork Chops glazed with citrus and soy
Start with a simple seasoning base (salt + one aromatic), then push flavor with a finishing element like lemon zest, a sticky glaze, or a fresh herb shower. In a 4.1 L basket, this works best as a single layer for even color. Give the basket a quick shake halfway so the hot air can reach every surface.
25. Halloumi glazed with citrus and soy
Start with a simple seasoning base (salt + one aromatic), then push flavor with a finishing element like lemon zest, a sticky glaze, or a fresh herb shower. In a 4.1 L basket, this works best as a single layer for even color. Pat ingredients dry before seasoning; moisture is the enemy of crunch.
26. Carrots tossed in harissa butter
Start with a simple seasoning base (salt + one aromatic), then push flavor with a finishing element like lemon zest, a sticky glaze, or a fresh herb shower. In a 4.1 L basket, this works best as a single layer for even color. A light mist of oil helps browning without turning things greasy.
27. Dumplings with a crunchy breadcrumb coat
Start with a simple seasoning base (salt + one aromatic), then push flavor with a finishing element like lemon zest, a sticky glaze, or a fresh herb shower. In a 4.1 L basket, this works best as a single layer for even color. If you’re cooking for a crowd, run two thinner batches instead of one packed one.
28. Banana Bread Slices with vanilla and warm spice
Start with a simple seasoning base (salt + one aromatic), then push flavor with a finishing element like lemon zest, a sticky glaze, or a fresh herb shower. In a 4.1 L basket, this works best as a single layer for even color. Use a rack or parchment only when it doesn’t block airflow.
29. Cauliflower tossed in harissa butter
Start with a simple seasoning base (salt + one aromatic), then push flavor with a finishing element like lemon zest, a sticky glaze, or a fresh herb shower. In a 4.1 L basket, this works best as a single layer for even color. Season right after cooking so salt and spices cling while the surface is hot.
30. Asparagus tossed in harissa butter
Start with a simple seasoning base (salt + one aromatic), then push flavor with a finishing element like lemon zest, a sticky glaze, or a fresh herb shower. In a 4.1 L basket, this works best as a single layer for even color. Give the basket a quick shake halfway so the hot air can reach every surface.
31. Popcorn Cauliflower with a crunchy breadcrumb coat
Start with a simple seasoning base (salt + one aromatic), then push flavor with a finishing element like lemon zest, a sticky glaze, or a fresh herb shower. In a 4.1 L basket, this works best as a single layer for even color. Pat ingredients dry before seasoning; moisture is the enemy of crunch.
32. Tofu glazed with citrus and soy
Start with a simple seasoning base (salt + one aromatic), then push flavor with a finishing element like lemon zest, a sticky glaze, or a fresh herb shower. In a 4.1 L basket, this works best as a single layer for even color. A light mist of oil helps browning without turning things greasy.
33. Corn Ribs with rosemary salt
Start with a simple seasoning base (salt + one aromatic), then push flavor with a finishing element like lemon zest, a sticky glaze, or a fresh herb shower. In a 4.1 L basket, this works best as a single layer for even color. If you’re cooking for a crowd, run two thinner batches instead of one packed one.
34. Onion Rings with a crunchy breadcrumb coat
Start with a simple seasoning base (salt + one aromatic), then push flavor with a finishing element like lemon zest, a sticky glaze, or a fresh herb shower. In a 4.1 L basket, this works best as a single layer for even color. Use a rack or parchment only when it doesn’t block airflow.
Foodie Techniques
The Philips HD9252/90 rewards small, intentional steps: dryness before heat, airflow around food, and a ‘finish’ that adds acid or aroma. These techniques are less about gadget tricks and more about building restaurant-style texture at home.
1) Build crunch with starch
For tofu, wings, and many vegetables, a whisper of cornstarch (or potato starch) creates micro-roughness that browns faster. Toss, tap off excess, and cook in a single layer.
2) Salt in two stages
Lightly salt before cooking to season the interior. Then taste and finish with flaky salt after cooking. This prevents ‘salty dust’ and keeps flavors bright.
3) Use finishing sauces the smart way
Sugary sauces burn when applied too early. Cook food nearly done, then glaze for the last short burst. This gives you shine and caramelization without bitterness.
4) Rest proteins
Resting isn’t optional. Pull chicken, fish, or pork slightly early, then rest a few minutes so juices redistribute. The final texture is noticeably better.
5) Treat herbs like perfume
Fresh herbs lose aroma with high heat. Add parsley, dill, basil, mint, or chives after cooking, not before. Your food will taste more vivid with less effort.
Cleaning & Maintenance
The best maintenance habit for the Philips HD9252/90 is boring but effective: clean while the residue is fresh. Old grease becomes sticky varnish, which makes every future cleanup feel harder than it needs to.
After each cook (5 minutes)
- Let the basket cool briefly, then wipe away visible grease with a soft cloth.
- Soak the basket and drawer in warm soapy water while you eat; it lifts residue without scrubbing.
- Dry fully before reassembling, so the HD9252/90 doesn’t develop stale odors.
Weekly reset
- Check corners and seams for baked-on drips; a soft brush is safer than metal tools.
- Wipe the exterior controls with a slightly damp cloth—grease film can make buttons feel less responsive.
- Inspect the cord and plug for heat damage, especially if your outlet is near the stovetop.
What to avoid
- Harsh scouring pads that can scratch non-stick coatings.
- Overfilling with soapy water that can creep into mechanical parts.
- Storing the unit with damp parts inside—moisture plus warmth equals funk.
Troubleshooting (15+ Common Problems + Fixes)
1. Frozen foods split
Start lower to thaw gently, then increase heat to crisp the outside. With the Philips HD9252/90, small workflow tweaks usually beat drastic temperature changes.
2. Vegetables shrivel
Use larger cuts, a touch of oil, and avoid overly long cook times. With the Philips HD9252/90, small workflow tweaks usually beat drastic temperature changes.
3. Uneven browning
Rotate or shake mid-cook and avoid blocking airflow with overstuffed parchment. With the Philips HD9252/90, small workflow tweaks usually beat drastic temperature changes.
4. Cheese leaks
Freeze breaded cheese bites briefly so they set before the outside browns. With the Philips HD9252/90, small workflow tweaks usually beat drastic temperature changes.
5. Food isn’t crisping
Reduce surface moisture, space pieces out, and add a small amount of oil for better browning. With the Philips HD9252/90, small workflow tweaks usually beat drastic temperature changes.
6. Display/buttons feel unresponsive
Wipe away grease, power-cycle the unit, and avoid wet hands on touch panels. With the Philips HD9252/90, small workflow tweaks usually beat drastic temperature changes.
7. Food tastes bland
Layer salt: season lightly before cooking and finish with a punchy condiment after. With the Philips HD9252/90, small workflow tweaks usually beat drastic temperature changes.
8. Food sticks
Preheat briefly, ensure non-stick surfaces are clean, and avoid sugary glazes too early. With the Philips HD9252/90, small workflow tweaks usually beat drastic temperature changes.
9. Edges burn before center cooks
Lower heat slightly and increase time; thick pieces need patience. With the Philips HD9252/90, small workflow tweaks usually beat drastic temperature changes.
10. Odors linger
Clean and dry thoroughly; run a brief empty warm-up with a lemon slice in a bowl. With the Philips HD9252/90, small workflow tweaks usually beat drastic temperature changes.
11. Dry chicken breast
Use a quick brine and pull earlier; carryover heat finishes the center. With the Philips HD9252/90, small workflow tweaks usually beat drastic temperature changes.
12. Reheating makes pizza leathery
Use moderate heat, short time, and finish with a quick high-heat burst. With the Philips HD9252/90, small workflow tweaks usually beat drastic temperature changes.
13. Basket rattles
Check the fit of the drawer and ensure the basket is seated properly. With the Philips HD9252/90, small workflow tweaks usually beat drastic temperature changes.
14. Seasoning falls off
Season after cooking or use a light oil mist so spices adhere to the hot surface. With the Philips HD9252/90, small workflow tweaks usually beat drastic temperature changes.
15. Fries turn soggy
Rinse and dry cut potatoes thoroughly, then cook in two stages: set the structure, then crisp. With the Philips HD9252/90, small workflow tweaks usually beat drastic temperature changes.
16. Breading goes patchy
Press crumbs firmly and spritz lightly; dry crumbs need help to brown evenly. With the Philips HD9252/90, small workflow tweaks usually beat drastic temperature changes.
17. Smoke or burning smell
Trim excess fat, clean drips from the pan, and cook fatty meats on a lower heat setting. With the Philips HD9252/90, small workflow tweaks usually beat drastic temperature changes.
Comparisons (Verified, Model-to-Model)
This comparison section keeps the claims anchored to the published specs and the official listings in the Sources above. The goal is simple: help you decide whether the Philips HD9252/90 matches your household and cooking style.
1. Philips HD9200/10
How it differs from the HD9252/90: Compact dial-control, 4.1 L class, 1400 W. If you care most about capacity, move up a class; if you care most about footprint, stay compact; if you want app workflows, choose a connected model.
2. Philips HD9280/60
How it differs from the HD9252/90: XL connected, 6.2 L class, 2000 W. If you care most about capacity, move up a class; if you care most about footprint, stay compact; if you want app workflows, choose a connected model.
3. Philips HD9263/90
How it differs from the HD9252/90: XL, 7 L pan, 1900 W, baking pan included. If you care most about capacity, move up a class; if you care most about footprint, stay compact; if you want app workflows, choose a connected model.
4. Philips HD9216/80
How it differs from the HD9252/90: Classic manual style, 1425 W. If you care most about capacity, move up a class; if you care most about footprint, stay compact; if you want app workflows, choose a connected model.
5. Philips HD9280/90
How it differs from the HD9252/90: XL connected, 6.2 L class, 2000 W. If you care most about capacity, move up a class; if you care most about footprint, stay compact; if you want app workflows, choose a connected model.
FAQ
What’s the best way to cook chicken wings?
Cook until fat renders and skin tightens, then finish hotter for crackle. A dry rub works better than a wet marinade early on.
How do I cook vegetables so they caramelize?
Dry them well, use a little oil, season boldly, and stop cooking as soon as edges brown.
How do I keep breading crisp?
Press crumbs firmly, spritz lightly with oil, and don’t sauce until the last moment.
What’s a good ‘finish’ for air-fryer food?
Think sauces, acids, and herbs: yogurt sauce, chimichurri, hot honey, lemon, or fresh scallions.
What size pan fits inside?
Choose a pan that leaves space around the sides so hot air can circulate. If it wedges tightly, it’s too big.
Is parchment paper okay?
It can be, as long as it doesn’t cover the entire base and choke airflow. Use perforated liners or trim a sheet to leave edges open.
How much oil should I use?
Often a mist or a teaspoon is enough. The goal is browning and spice adhesion—not frying in a pool.
How do I avoid a ‘steamed’ texture?
Give food space, avoid wet batters, and don’t pile food into a mound.
What’s the easiest ‘first recipe’?
Try seasoned potato wedges: forgiving, fast feedback, and easy to adjust crispness.
Why do fries taste ‘raw’ inside?
Your pieces are too thick or you started too hot. Lower the heat slightly, cook longer, then finish hot to crisp.
How do I make tofu crisp?
Press it well, use cornstarch, and cook in a single layer with a brief shake midway.
Do I need special accessories?
Not required, but a small baking pan and a rack can expand what you cook. Keep accessories sized to preserve airflow.
How do I stop food from drying out?
Choose thicker cuts, use a quick brine or marinade, and avoid running long at high heat. Finish with a sauce, compound butter, or a squeeze of citrus.
What’s a good shaking rule?
If pieces touch each other, shake halfway. If they stack, shake twice. If they’re single-layer and spaced, one turn is enough.
What should I do if cooking feels inconsistent?
Standardize one variable at a time: portion size, basket loading, and shake timing. Consistency comes from repeatable habits.
How do I reduce smoke with fatty foods?
Cook at a modest heat, trim excess fat, and keep the pan clean. Smoke is usually fat drippings hitting hot surfaces.
What’s the best way to cook frozen snacks?
Cook frozen items in a single layer, shake once or twice, and resist the urge to overcrowd. Overcrowding traps steam and softens the crust.
Is dishwasher cleaning okay?
Many removable parts are dishwasher-safe on Philips models; confirm in the manual and avoid harsh cycles if you want coatings to last.
Why does food taste overly salty?
Salt is stronger after dehydration. Season lightly before cooking and adjust at the end.
Is the capacity enough for my household?
If you’re regularly feeding more than a couple people, 4.1 L can reduce how often you need to run multiple rounds.
Can I use the unit for meal prep?
Yes—cook components separately (protein first, veg second) and reheat briefly to serve.
Can I bake in it?
Yes—use a small pan or a ramekin that fits comfortably and doesn’t block airflow. Bakes tend to like moderate heat and a slightly longer time.
Can I cook steak?
Yes for thinner cuts or a quick sear-style approach. Use a thermometer and rest before slicing.
How do I stop cheese from exploding?
Freeze breaded cheese briefly so the center stays contained while the outside browns.
How do I keep fish from sticking?
Lightly oil the surface, use a gentle turn, and wait until the fish releases easily before flipping.
Do I need to flip everything?
Not everything, but flipping improves browning on thick pieces and reduces pale spots.
How do I get restaurant-style crunch?
Use starch (cornstarch or potato starch), a light oil mist, and avoid crowding. Crispness is airflow plus dryness.
Can I cook multiple foods at once?
Yes, if aromas are compatible. Keep delicate foods away from splattering fatty foods and consider cooking in stages.
Can I reheat leftovers without making them tough?
Use moderate heat, short bursts, and finish quickly. A splash of water in a small dish can soften starches before you re-crisp.
How do I clean the basket faster?
Soak warm with a little dish soap, then use a soft brush. Avoid metal tools that can damage coatings.
Do I need to preheat the Philips HD9252/90?
For most foods, a short warm-up helps browning, but you can also start cold and add a minute or two. Use the same approach consistently so you can refine your timing.
Buyer Guidance
Buying the Philips HD9252/90 is mostly about matching your cooking habits to the basket. If you cook fries once a week, almost any size works. If you cook dinner in it several nights a week, capacity and workflow matter more than flashy claims.
Choose based on your ‘most common meal’
If your typical cook is a protein + a vegetable side, prioritize space over maximum features. If your typical cook is snacks for kids, prioritize speed and easy cleanup. The HD9252/90 fits best when you can picture it handling your default meal without you having to ‘make it work.’
Counter space and storage
Measure your countertop and your clearance under cabinets. The published dimensions for this model are 360 × 264 × 295 mm (see the Verified Specs Table). That’s the practical check that prevents ‘I love it, but it doesn’t fit.’
Connected features: helpful, not mandatory
If your HD9252/90 variant supports app control, treat it as a convenience layer: recipe inspiration, reminders, and remote checks. It won’t replace good technique, but it can make weeknight timing smoother.
Common search phrases people use
- Philips HD9252/90 review
- Philips HD9252/90 settings
- Philips HD9252/90 cooking times
- Philips HD9252/90 chicken wings
- Philips HD9252/90 fries
- Philips HD9252/90 cleaning
- Philips HD9252/90 troubleshooting
- Philips HD9252/90 basket size
- Philips HD9252/90 accessories
- how to use Philips HD9252/90
- best recipes for Philips HD9252/90
- Philips HD9252/90 frozen food
- Philips HD9252/90 reheat pizza
- Philips HD9252/90 crispy tofu
- Philips HD9252/90 salmon
- air fryer keep warm function
- 4.1 L air fryer what fits
- air fryer troubleshooting guide
- why is my air fryer food not crispy
- air fryer meal prep ideas
- air fryer chicken breast juicy
- air fryer cleaning quick method
- how to stop smoke in air fryer
- air fryer desserts easy
- air fryer vegetables caramelized
- air fryer temperature guide
- air fryer cooking in batches
- air fryer basket liner advice
Conclusion
The Philips HD9252/90 is a strong choice when you want crisp results with a practical, repeatable workflow. Its 4.1 L size gives you room for real portions. The biggest upgrade isn’t a secret setting—it’s consistent loading, drying, shaking, and finishing with bold flavor.
If you adopt one habit, make it this: cook in a single layer whenever crispness matters, and don’t be afraid of a second quick batch. That’s how the HD9252/90 stays fast, predictable, and genuinely useful—night after night.